Couple of months back, I wrote an article on “How did I get started with pyVmomi on ubuntu distro?”, which was very well received. Recently I got several requests from readers on how to set pyVmomi on Windows platform and I thought to write this tutorial, which will take you through steps required to set pyVmomi on my Windows 10.
Step 1: Install latest python for windows.
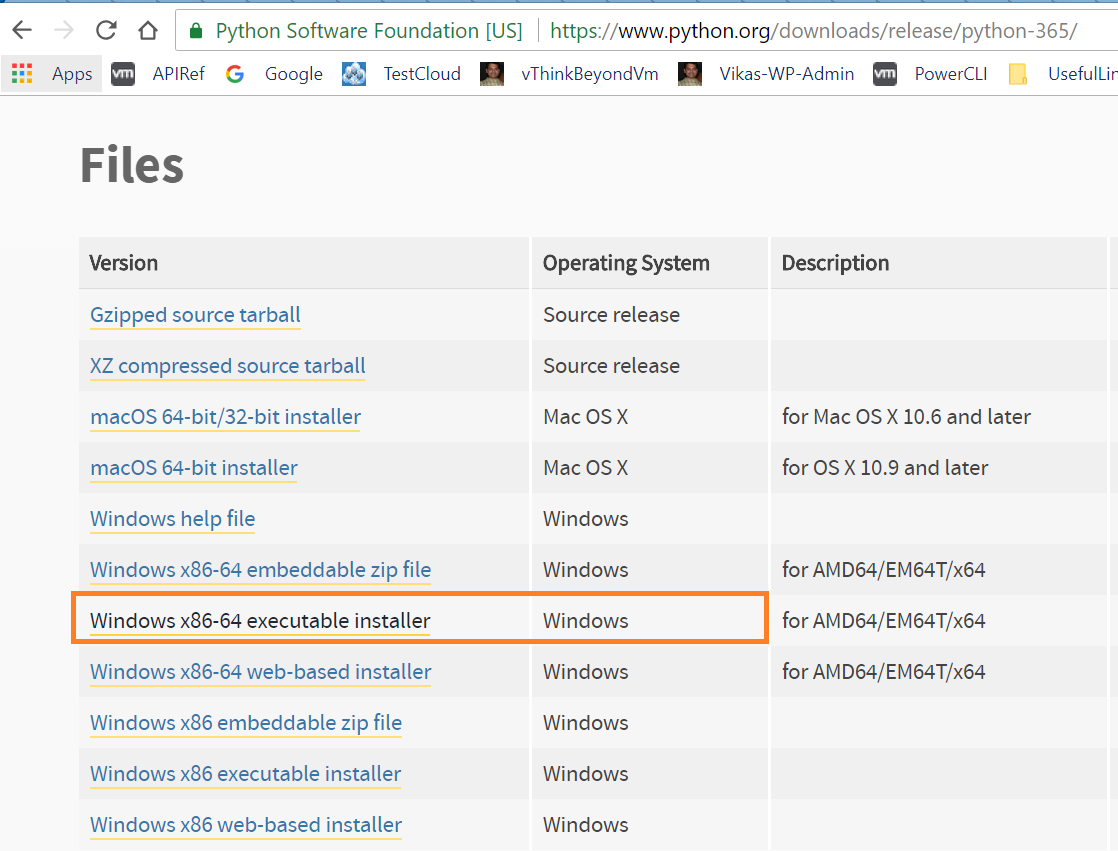
Latest 3.x python version available is 3.6.5 on python official portal . Download the python installer as pointed out in below screenshot.
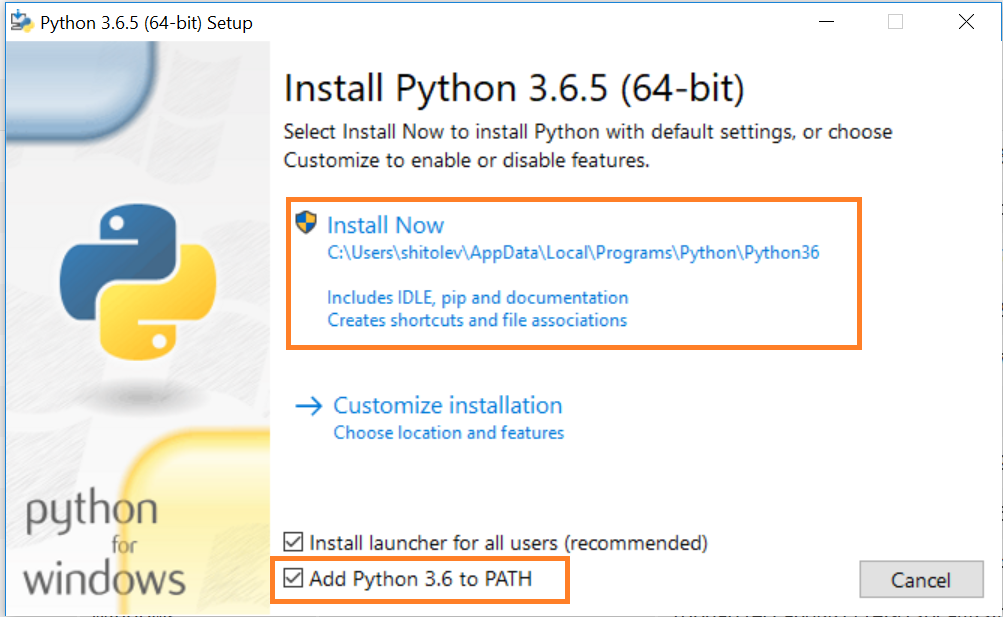
Once downloaded, while installing python, make sure to select checkbox “Add python 3.6 to PATH” as shown below.
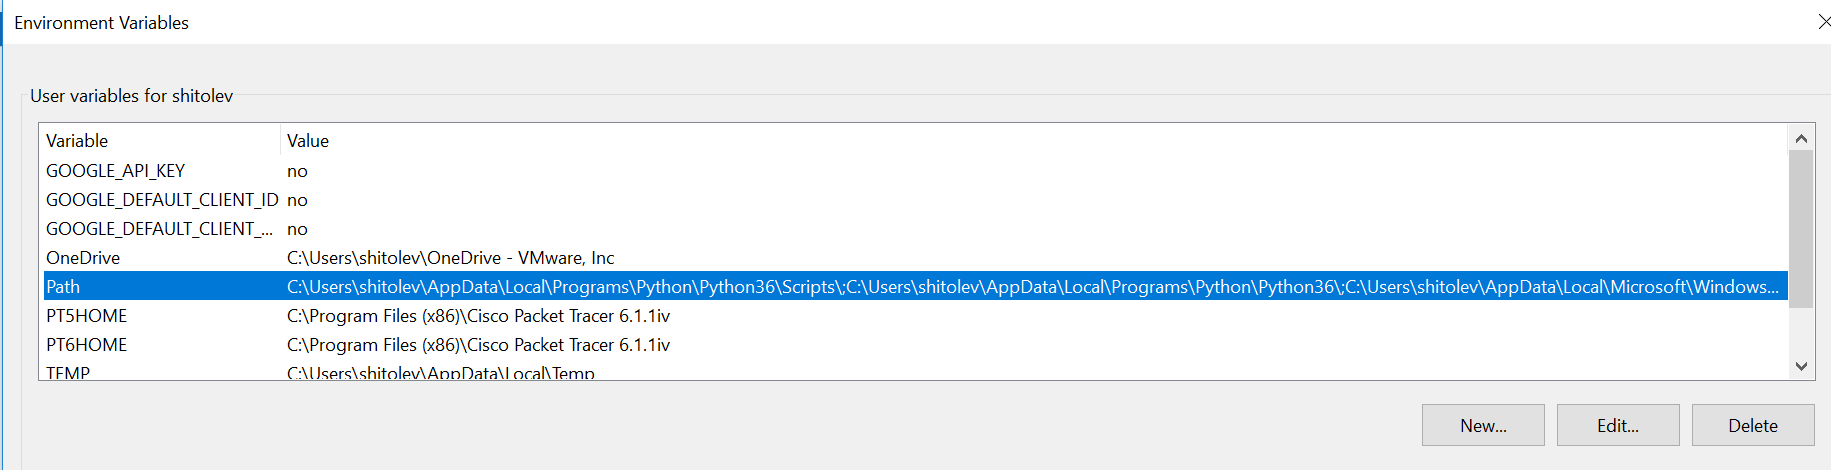
As soon as installation is completed, I checked environment variable and I see that python 3.6 path is set properly as shown below.
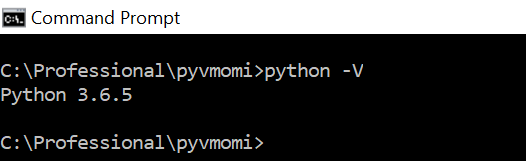
I see that python is installed as expected at directory i.e. C:\Users\shitolev\AppData\Local\Programs\Python\Python36, which is default directory. I also checked python version using “python -V” command and I see correct python version is installed.
Step 2: Install pyvmomi and pyvim python modules
As I already discussed in my pyVmomi on ubuntu article, we need “pip” to install these python modules. Note that “pip” itself gets installed as part of python installation. Let us go ahead for “pyvmomi” and pyvim” modules installation by running this command
“python.exe -m pip install pyvmomi pyvim” . You can run this command from any directory of your choice.
Below is how it looks like
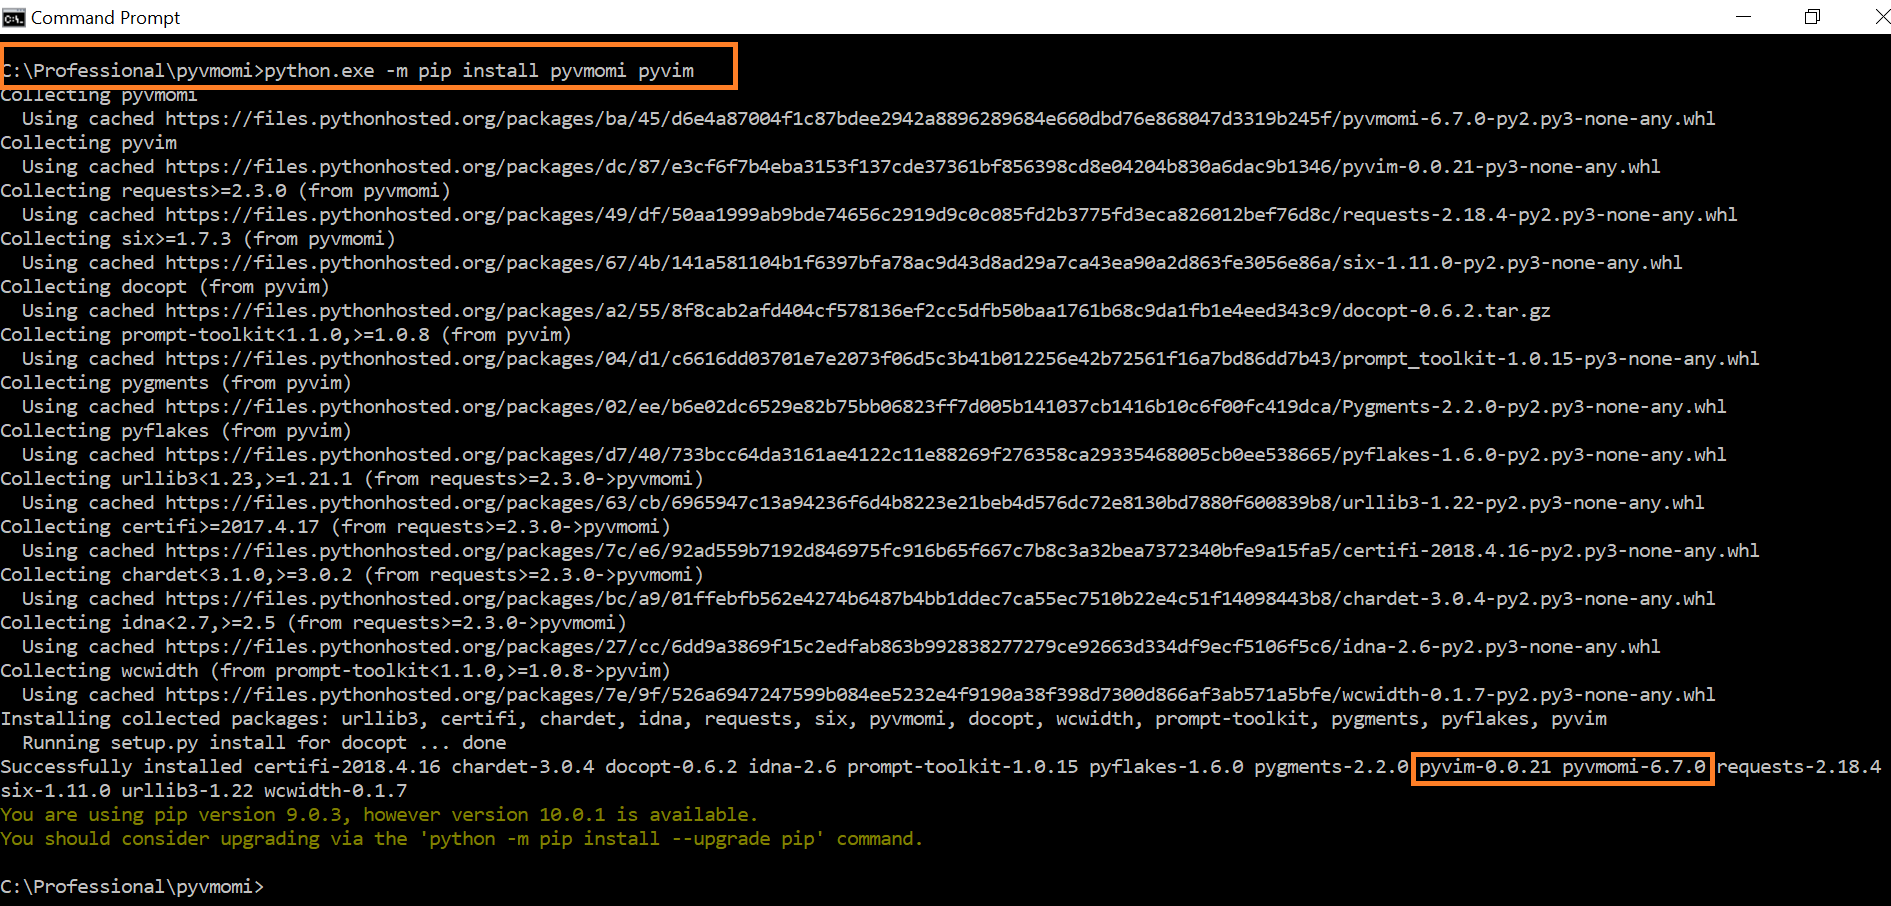
you can see that latest “pyvmomi” i.e. the one supports vSphere 6.7 and “pyvim” python modules got installed successfully. I also see that these modules are installed at python directory i.e. C:\Users\shitolev\AppData\Local\Programs\Python\Python36\Lib\site-packages
Now that we are done with setting up pyVmomi on Windows, its time to run a vSphere API sample to confirm everything is working fine.
Step 3: Running vSphere API sample.
For the sake of simplicity I chose the same sample I used in my ubuntu article
[python]
# VMware vSphere Python SDK, pyvmomi
# Simple script to get vCenter server product details
from pyVim.connect import SmartConnect
import ssl
s=ssl.SSLContext(ssl.PROTOCOL_SSLv23) # For VC 6.5/6.0 s=ssl.SSLContext(ssl.PROTOCOL_TLSv1)
s.verify_mode=ssl.CERT_NONE
si= SmartConnect(host="10.192.1.2", user="Administrator@vsphere.local", pwd="VMware#123", sslContext=s)
aboutInfo=si.content.about
print ("Product Name:",aboutInfo.fullName)
print("Product Build:",aboutInfo.build)
print("Product Unique Id:",aboutInfo.instanceUuid)
print("Product Version:",aboutInfo.version)
print("Product Base OS:",aboutInfo.osType)
print("Product vendor:",aboutInfo.vendor)
[/python]
We can keep this sample file at any location of our choice and execute it as follows.
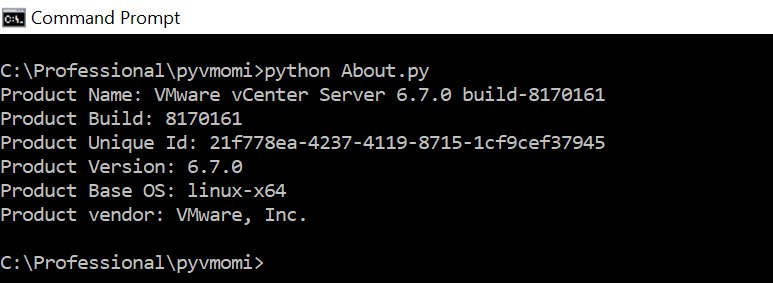
Output shows that this small pyvmomi script got executed on vSphere 6.7 successfully. How cool is that?
Note: I would like you to take a look at line #7, where I had to use “ssl.PROTOCOL_SSLv23” protocol for VC 6.7 connection. For VC 6.0 and 6.5, I used “ssl.PROTOCOL_TLSv1”.
Useful resources
1. Please take a look at tutorial on how to get hold of vSphere objects and play around. Take a look at some cool samples on VC HA
2. If you want to contribute to pyVmomi, refer pyvmomi and its samples github repo
3. Not interested in Python vSphere SDK? no problem, take a look at vSphere Java SDK and PowerCLI posts.
4. Getting started with vCenter server REST APIs using python

Vikas Shitole is a Senior Tech Lead at VMware by Broadcom, VCF division, India, where he leads system test efforts—including scale, stress, and resiliency testing—and drives product quality across VMware Cloud Foundation (VCF), Broadcom’s flagship private cloud platform. He is an AI and Kubernetes enthusiast, and is passionate about VMware customers and automation around vSphere and VCF. Vikas has been honoured as a vExpert for 13 consecutive years (2014–2026) for his sustained technical contributions and community leadership. He is the author of two VMware Flings, holds multiple industry certifications including VCF admin 9.0, and is one of the top contributors to the VMware API Sample Exchange, where his automation scripts have been downloaded over 50,000 times. Vikas has shared his expertise as a speaker at international conferences such as VMworld Europe and VMworld USA, and was selected as an official VMworld 2018 blogger. He also served as lead technical reviewer for the Packt-published books vSphere Design and VMware Virtual SAN Essentials. Beyond tech, Vikas is a dedicated cricketer, cycling enthusiast, and a lifelong learner in fitness and nutrition, with the personal goal of completing an Ironman 70.3