You might have read my last post on YAVI JAVA. In this post I am going to take you through setting up eclipse environment in order to get started with YAVI JAVA. This post is written by keeping not only existing VMware users in mind but also college students.
There are 4 ways listed here to get started with YAVI JAVA, one of the most used,easiest and quickest one is the first one i.e. obtaining YAVI JAVA package from Maven central repository. Here we go.
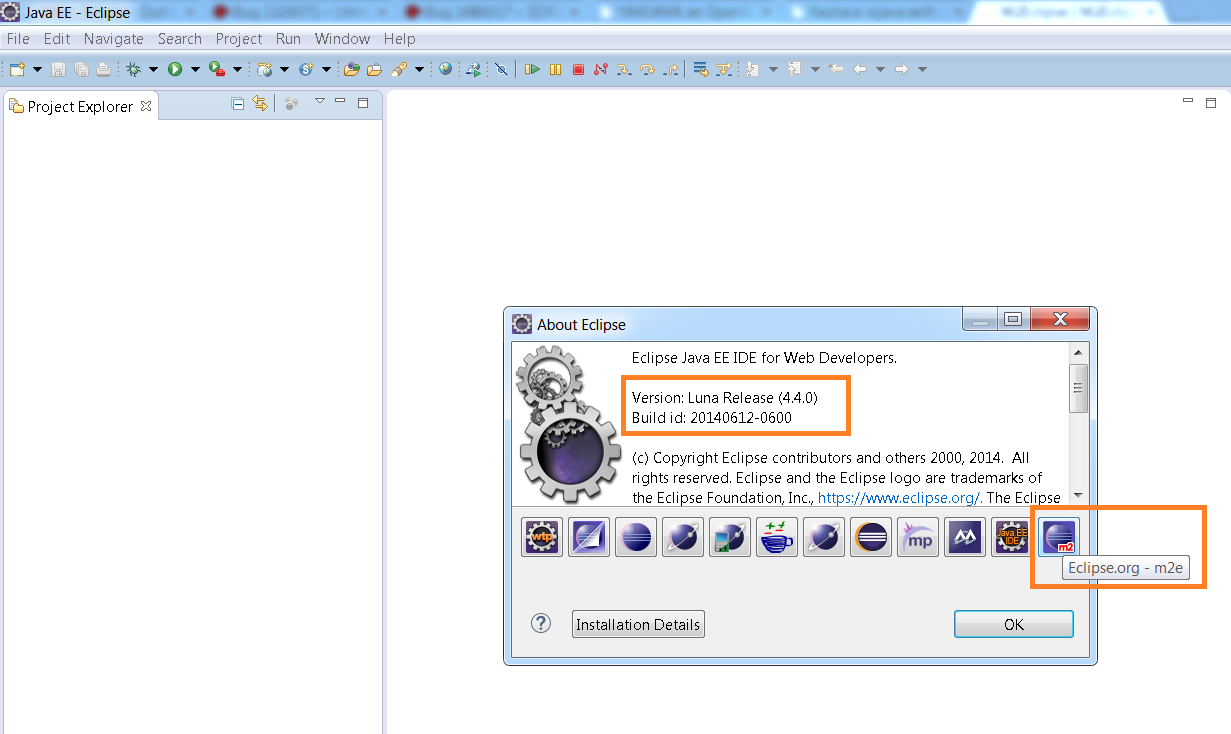
Step 1:: Download the Eclipse that has built in Maven integration. However, Maven is integrated with other IDEs such as NetBeans, Intelli IDEA etc. I like Eclipse so I am going to show you steps for eclipse, you could follow the same for other IDEs, it should work fine. Below is the Eclipse version I have downloaded which has Maven built in.
For getting started with YAVI JAVA, you are not required to be expert in Maven, even it is OK if you do not know anything about Maven. If you are interested, do read what is Maven here.
Step 2: Create a Maven project as shown in below screenshot.

Step 3: Select the “Create Simple project” as shown below.

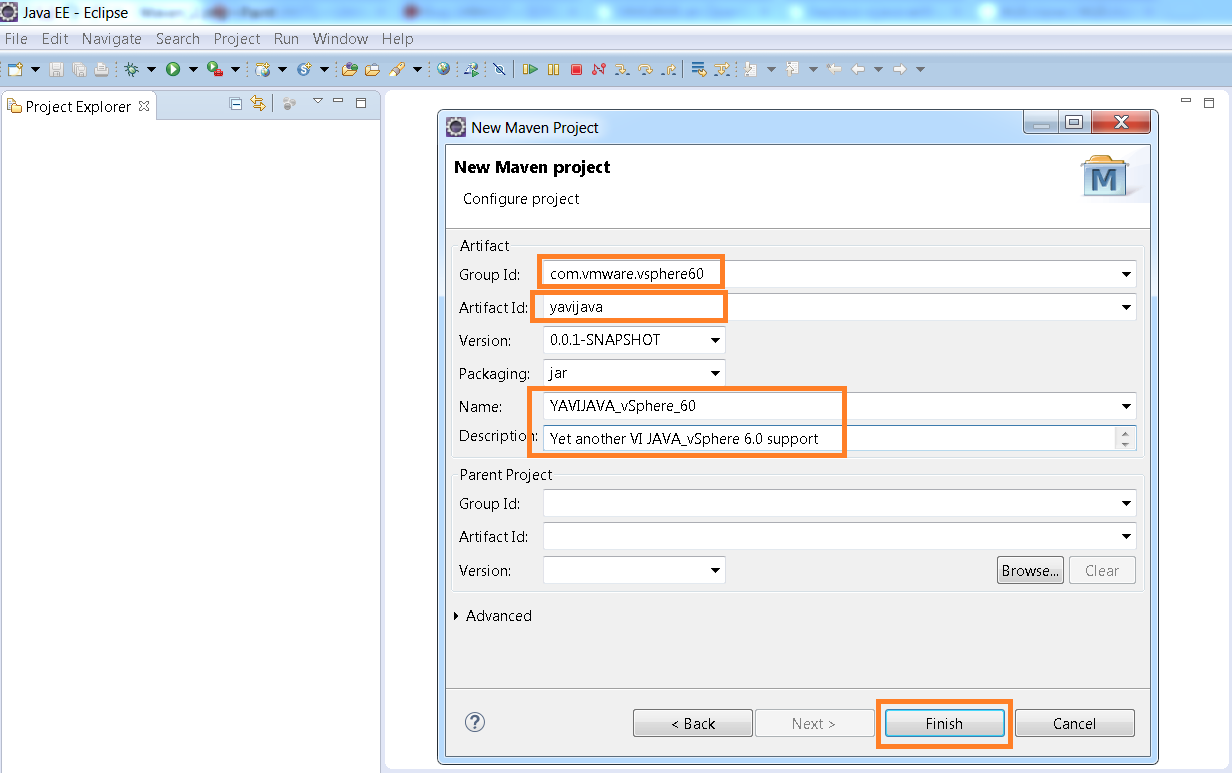
Step 4 : Next is to specify the Group id, Artifact id, version, Name etc. This can be anything of your choice as shown below and click on Finish.
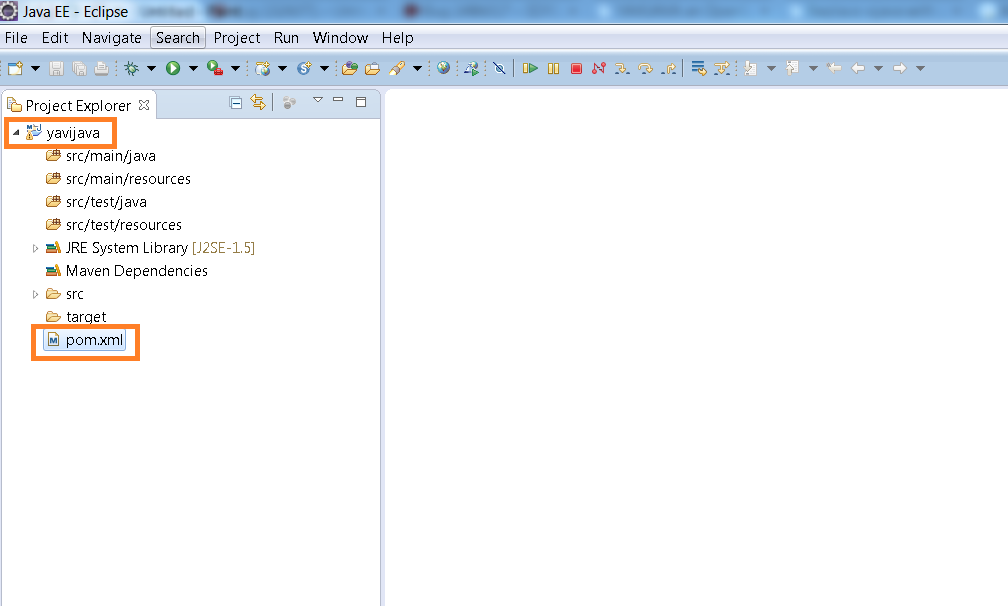
Once clicked on FINISH, below is how it looks like when Maven project is created.
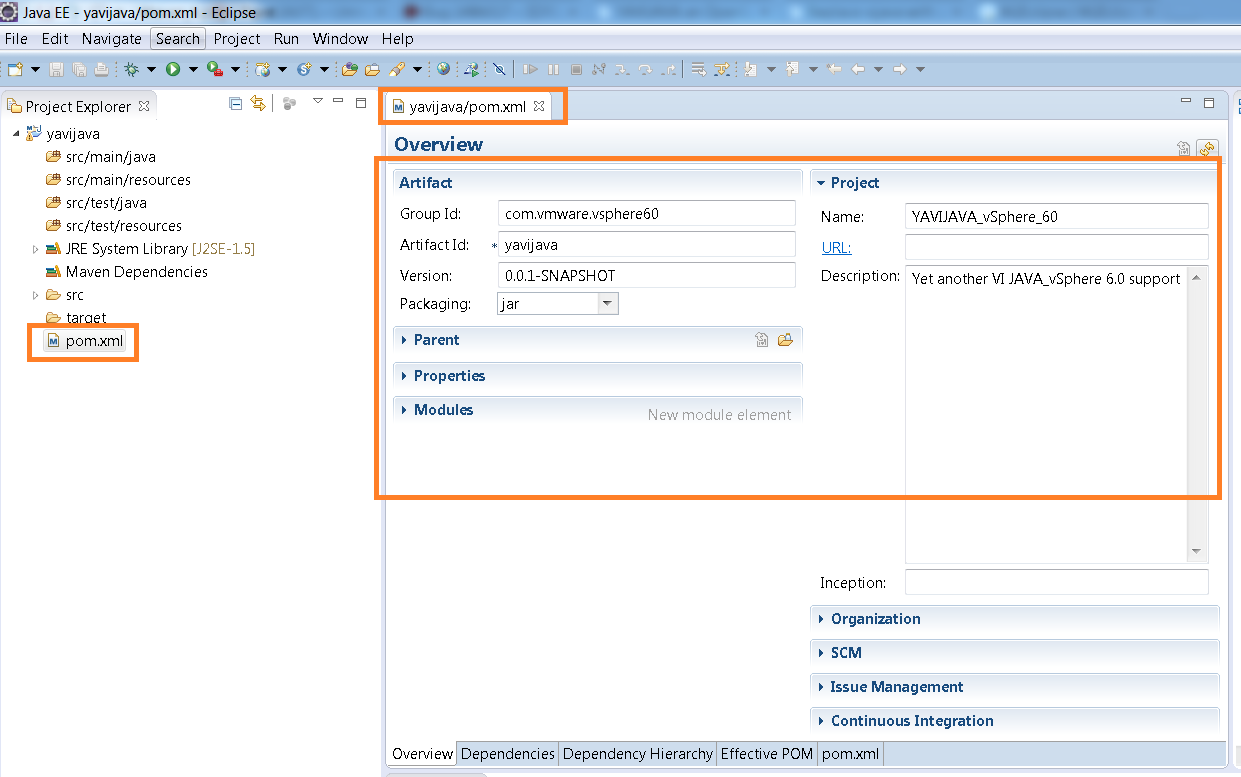
Step 5: Next we need to modify the POM.xml file. With every Maven project, one POM.xml file gets generated. Below is the overview of the existing POM.xml file got created when we created the project. POM.xml file is the one which tracks/resolves all the dependencies required for your project.
Step 6: Click on the dependencies tab in the bottom as shown below screenshot.
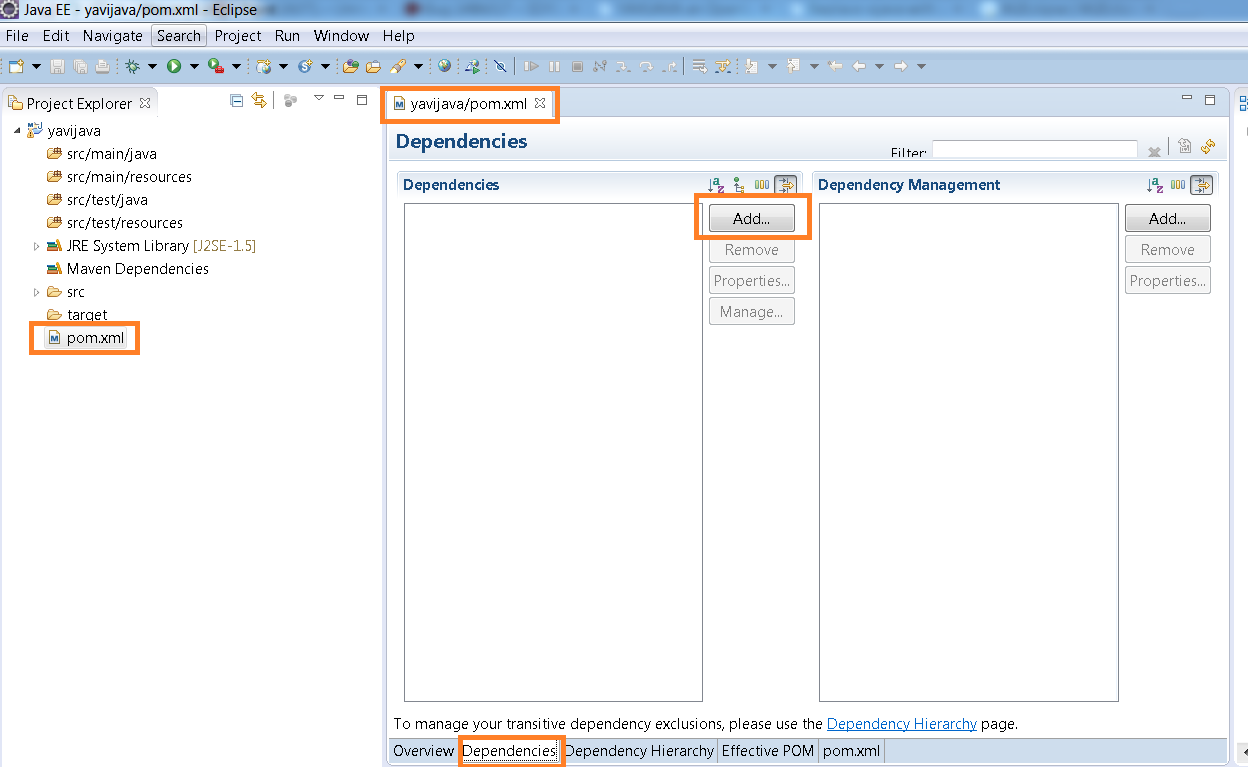
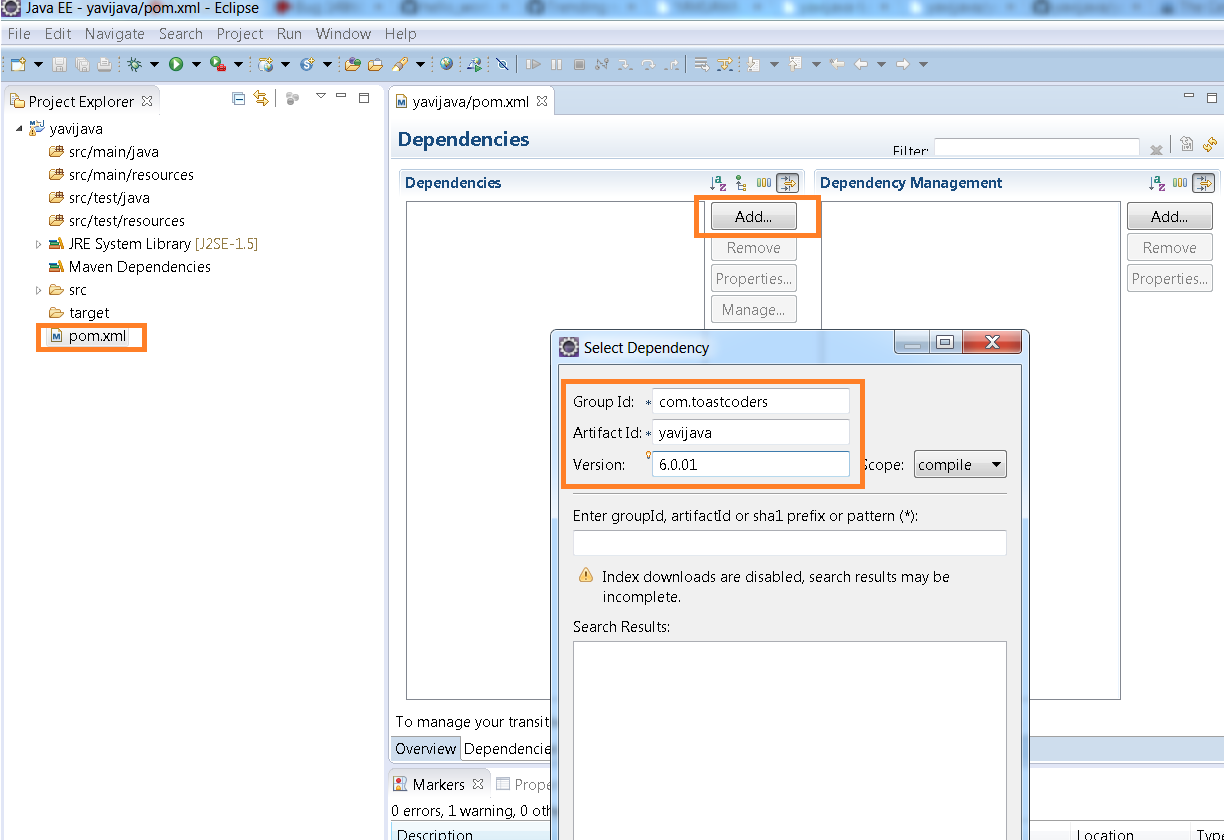
Now click on ADD button and enter the YAVI JAVA Maven group id, artifact id and version as shown in below screenshot
groupId : com.toastcoders
artifactId: yavijava
version :6.0.01 (or any YAVI JAVA version of your choice): Recommendation is to use latest available version on Maven central repository
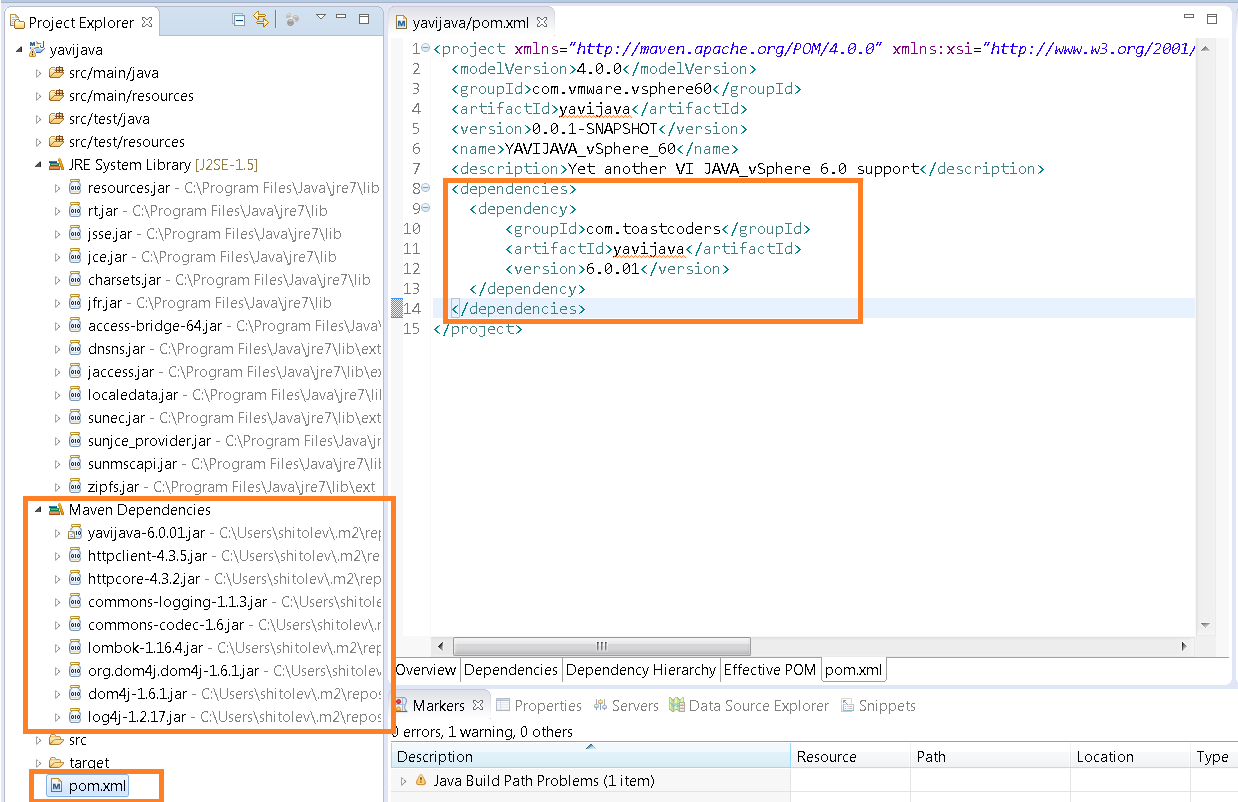
Step 7: As soon as you click on OK in above step, make sure you can see entry in POM.xml file and required Maven dependencies jars as shown below.
That’s all. Now you are all set to play with new APIs introduced in vSphere 6.0. Let me know if you face any issues.
All the samples and tutorials specified in this post will work just fine.
Note: YAVI JAVA supports VMware vSphere 4.0 and above (4.1, 5.0, 5.1, 5.5, 6.0).
Please do stay tuned for all the interesting samples on new features introduced in vSphere 6.0.

Vikas Shitole is a Senior Tech Lead at VMware by Broadcom, VCF division, India, where he leads system test efforts—including scale, stress, and resiliency testing—and drives product quality across VMware Cloud Foundation (VCF), Broadcom’s flagship private cloud platform. He is an AI and Kubernetes enthusiast, and is passionate about VMware customers and automation around vSphere and VCF. Vikas has been honoured as a vExpert for 13 consecutive years (2014–2026) for his sustained technical contributions and community leadership. He is the author of two VMware Flings, holds multiple industry certifications including VCF admin 9.0, and is one of the top contributors to the VMware API Sample Exchange, where his automation scripts have been downloaded over 50,000 times. Vikas has shared his expertise as a speaker at international conferences such as VMworld Europe and VMworld USA, and was selected as an official VMworld 2018 blogger. He also served as lead technical reviewer for the Packt-published books vSphere Design and VMware Virtual SAN Essentials. Beyond tech, Vikas is a dedicated cricketer, cycling enthusiast, and a lifelong learner in fitness and nutrition, with the personal goal of completing an Ironman 70.3